
13 Naan Recipes That Work Without a Tandoor
Updated July 15, 2026 · Curated by Chefadora

The best naan recipes have almost nothing to do with a secret ingredient and everything to do with heat, hydration and timing. I've cooked this flatbread against the wall of a real tandoor exactly once, in a restaurant kitchen in Southall, and every other time on an ordinary cast-iron tawa over a home burner. The tawa version was better nine times out of ten. What actually matters is a slack, sticky dough that you're slightly nervous about handling, a pan hot enough to make you flinch, and the discipline to pull the bread off while it still looks a shade underdone.
The thirteen below cover the full range: plain and butter-brushed for mopping gravy, garlic-slicked and blistered, cheese-pulled, spinach-and-potato stuffed, and a handful of complete dinners where the bread arrives beside butter chicken or a pot of masoor dal. A couple skip yeast altogether, and one swaps refined flour for whole wheat.
Some take fourteen minutes. One is an honest weekend project. All of them are built for an ordinary stovetop and a pan you already own.
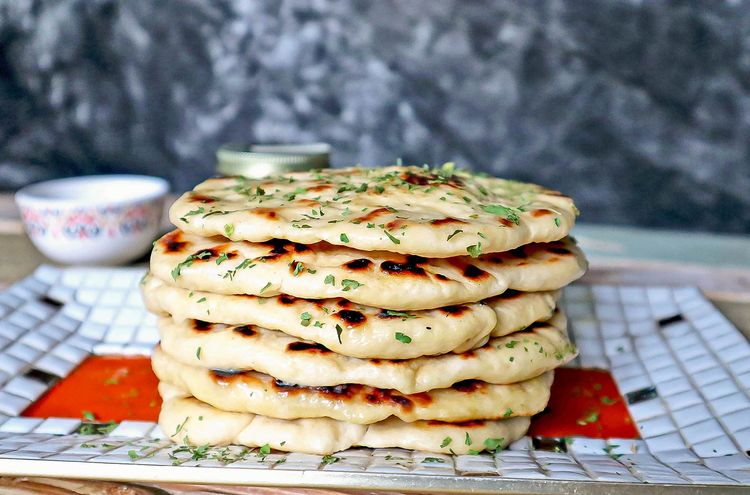
Classic Butter and Plain Naan Recipes to Master First
Start here. A plain, butter-brushed round is the honest test of your technique — there's no garlic or molten cheese to hide behind, so you find out quickly whether your dough was hydrated enough and your pan hot enough. These four run from a fourteen-minute pantry version to a ninety-minute yeasted dough with a slow rise, and the difference shows up in the chew rather than the flavour. If you're feeding a table, roll every portion first, stack them under a damp cloth, and cook back to back — the pan only improves as it goes. Brush with melted butter the second each one leaves the heat, while the surface is still steaming and will drink it in.


- Vegetarian
- Bread & Baking


- Indian
- Vegetarian
- Dinner


- Indian
- Vegetarian
- Dinner

- Indian
- Vegetarian
- Snack
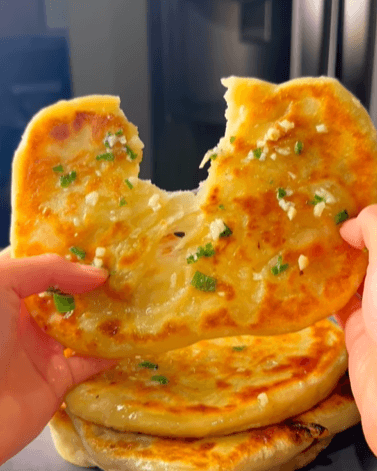
Garlic and Cheese-Loaded Flatbreads
Garlic is the flavour most people are actually chasing when they order this bread out, and there are two ways to deliver it. Raw minced garlic pressed into the surface before cooking goes sweet and slightly caramelised against the pan. Garlic bloomed in butter and brushed on afterwards stays sharper and more perfumed. The recipes here do both, and one of them adds cheese to the middle, which changes the physics entirely — you need a lower flame and a lid so the interior melts before the base burns. A tip I stand by: chop the garlic rather than crushing it, because a paste weeps water into the dough and slows the blistering.

- Indian
- Vegetarian
- Dinner

- Indian
- Vegetarian
- Side Dish

- Indian
- Vegetarian
- Snack
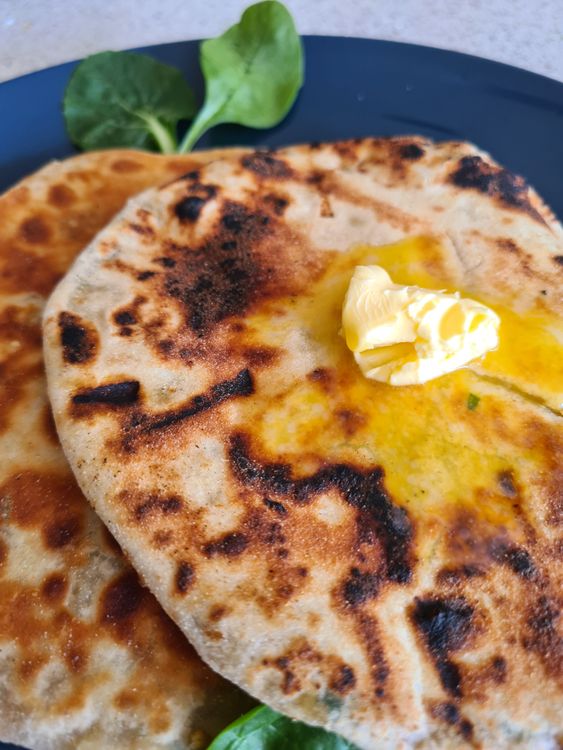
Stuffed Flatbreads That Eat Like a Meal
Once you seal a filling inside, you're not making a side dish anymore — you're making dinner. The two here take ninety minutes-plus for a good reason: fillings have to be cooked, cooled and dried before they go anywhere near the dough, or the steam they release will tear the round open on the pan. Cool the mixture completely, keep it drier than feels right, and use less than you want. Seal by pleating the edges up over the filling like a purse, pinching hard, then flattening gently with your palm before the rolling pin ever touches it. Roll from the centre outward, never back and forth.

- Indian
- Vegetarian
- Breakfast

- Indian
- Non-Vegetarian
- Lunch
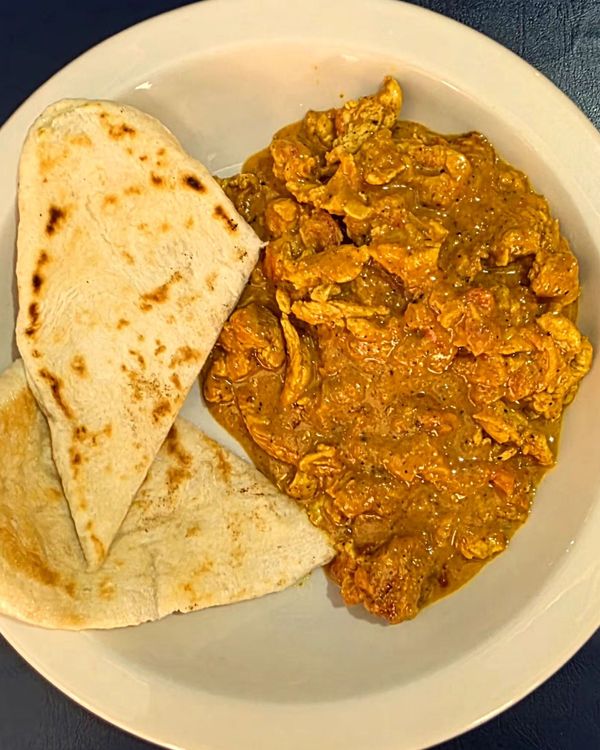
Full Plates: Butter Chicken, Dal and Fresh Bread
These four treat the bread as part of a whole dinner rather than an afterthought, which solves the biggest timing problem in Indian home cooking: the flatbread has to be eaten within minutes of leaving the pan, but the curry wants an hour. The fix is to make the dough first, let it rise while the gravy simmers, and cook the rounds last while the curry sits off the heat and settles. Butter chicken benefits from ten minutes of resting anyway — the cream and tomato pull together. One of these builds out a full thali with red lentil dal, a potato sabji and rice, and it's the best batch-cooking value on this page.

- Indian
- Non-Vegetarian
- Lunch
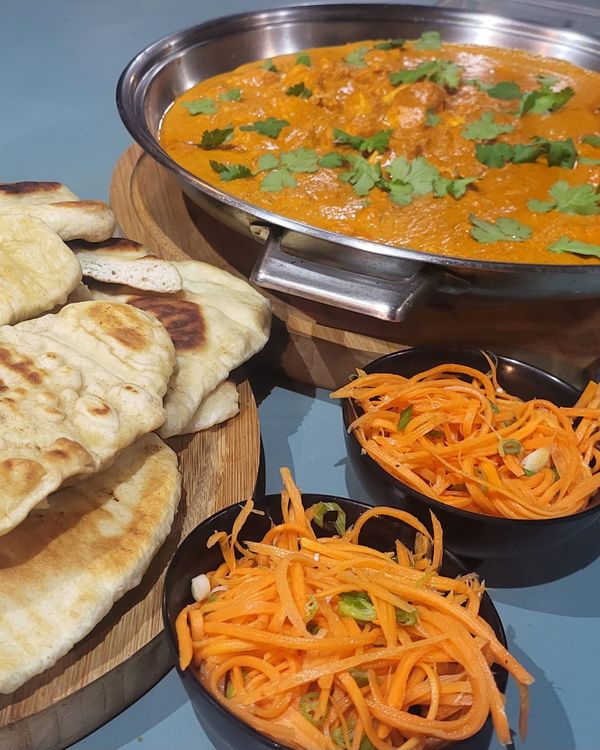
- Indian
- Non-Vegetarian
- Dinner
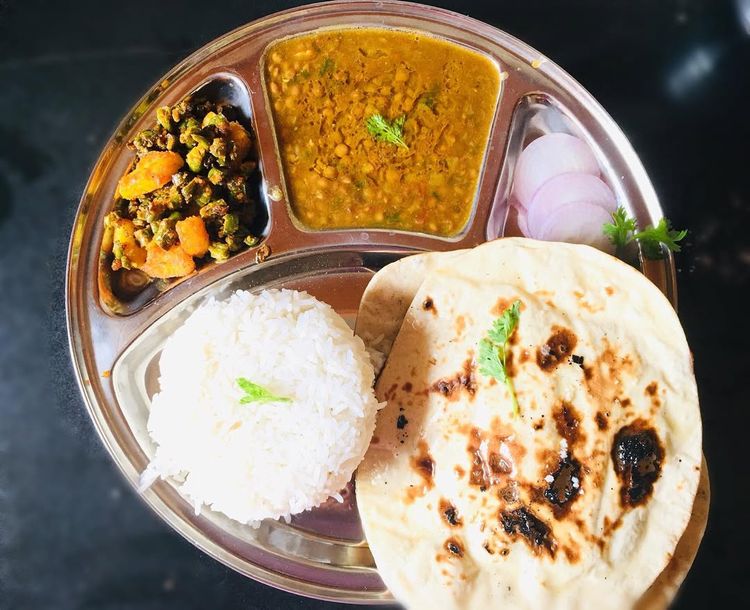
- Indian
- Vegetarian
- Lunch

- Indian
- Non-Vegetarian
- Main Course
Naan Dough: Yeast vs Yogurt vs No-Yeast
Three leavening routes show up across this collection, and they are not interchangeable. Each gives you a different bread, and picking the wrong one for your evening is the most common mistake I see.
Yeast is traditional and rewards patience. A teaspoon of instant yeast in warm water, a rise of forty-five to ninety minutes, and you get large irregular air pockets, a slightly sour depth, and that pull-apart chew you remember from a good restaurant. The ninety-minute version here takes this route. It needs planning, but forgives rough handling later, because a well-risen dough is elastic and strong.
Yogurt is the shortcut with the best texture-to-effort ratio. Full-fat plain yogurt brings acidity that tenderises the gluten and moisture that keeps the crumb soft the next day. Paired with baking powder, it puffs fast under high heat. Use thick yogurt, not runny — and hold back some water, because yogurt is roughly eighty-five percent water and will slacken the dough more than you expect.
No-yeast, no-yogurt versions lean entirely on baking powder and milk or water. Two recipes here go that way, including the thirty-minute instant one. The trade-off is honest: you lose fermented complexity and gain forty minutes of your life. The crumb is tighter and more scone-like, which nobody notices once it's brushed with butter and torn in half.
Whatever route you take, hydration matters more than leavening ever will. Aim for a dough that's tacky and slightly reluctant to leave your palm — if it feels smooth, tidy and easy to handle, you've almost certainly added too much flour. Dry dough gives you a cracker, and no amount of butter afterwards fixes it.
Cooking Naan Without a Tandoor
A tandoor runs around 450–480°C, and your kitchen cannot do that. You don't need to — you only have to reproduce two things: fierce contact heat from below and radiant heat from above. Every recipe here is tagged stovetop, so this is the method that matters.
Cast iron is the answer. A heavy tawa or skillet holds enough thermal mass that it doesn't crash in temperature the moment cold dough lands on it, which is exactly why a thin nonstick pan fails at this — it gives you a pale, leathery round. Preheat over medium-high for a full five minutes, longer than feels reasonable. A drop of water should skitter and vanish, not sit and hiss.
Then use the trick that changes everything: brush the top surface of your rolled dough with water before it goes down, water side up. Slap it down, wait forty to sixty seconds until bubbles dome up across the surface, and now flip the whole pan over and hold it directly above the flame so the bubbles catch and blacken. This mimics the tandoor's radiant heat. If you have an electric hob, skip the invert and instead flip the bread and press the bubbles down with a folded cloth for thirty seconds.
The grill in your oven is the fallback. Preheat a baking steel or heavy tray at maximum for a full twenty minutes, slide the bread straight onto it, and run the overhead grill hard for ninety seconds. It's not quite the same — you miss the sharp contact char along the base — but it's close enough to be well worth doing when you're cooking eight at once for a table of people.
Getting Those Charred Bubbles
The leopard-spotted blistering is the thing people find hardest to replicate at home, and it comes down to steam physics rather than skill. A bubble forms when water inside the dough flashes to vapour faster than it can escape, lifting the top skin away from the base. Everything you do should serve that single moment.
First, the dough must be wet enough. Water is the fuel. A stiff, floury dough has nothing to flash into steam, and it will lie flat and disappointing no matter how hot your pan is. If your rounds are coming out dense, add water before you add heat.
Second, roll unevenly on purpose. Perfect uniform thickness gives you a uniformly boring bread. Leave the centre slightly thicker and the edges thin, and let the shape go a bit rustic and teardrop — those variations are where the biggest bubbles start. Stop rolling at roughly three millimetres. Thinner than that and there's no interior left to inflate.
Third, do not touch it. The urge to press the bread down with a spatula is strong and it is fatal — pressing collapses the very pocket you're trying to build. Leave it alone for the first minute.
Fourth, the pan must be preheated properly and stay hot. If the second round comes out paler than the first, you're cooking too fast for the pan to recover; give it forty seconds between breads.
Finally, let some spots genuinely blacken. Small charred patches are flavour, not failure. If nothing on the surface goes dark, your heat was too low and you traded taste for tidiness.
Serving and Storing
Fresh off the pan, brush with melted butter or ghee immediately — the surface is still open and steaming and pulls the fat straight in, which is why restaurant bread tastes richer than yours even when the dough is identical. Then stack the rounds in a clean tea towel and fold it closed. Trapped steam softens them and keeps them pliable for the twenty minutes it takes to cook the rest. Never leave them spread out on a rack; airflow is the enemy here, and they go stiff within five minutes.
For storing, cool completely first, then stack with baking paper between each round and seal in a zip bag. They keep two days at room temperature and freeze beautifully for three months. Do not refrigerate them — the four-degree range is precisely where starch retrogradation runs fastest, and you'll get a stale, chalky bread by morning. The freezer skips straight past that window.
Reheating is where most people undo their own work. The microwave turns them rubbery. Instead, flick a few drops of water onto the surface and put it back on a dry hot pan for thirty seconds a side. From frozen, go straight onto the pan without thawing — the ice crystals become the steam that re-inflates it, and it comes back genuinely close to fresh.
For serving, tear rather than cut, and keep the pieces going into anything with a gravy: butter chicken, masoor dal, a potato sabji. Several of the recipes here already build that pairing for you. Leftovers make an excellent base for a quick pizza under the grill, or cut them into wedges, fry in ghee, and serve with pickle.
Pro Tips
- Weigh your flour instead of scooping it. A cup can vary by thirty grams depending on how tightly it's packed, and that swing is the single biggest reason a dough that behaved perfectly last week comes out dry and cracker-like this one. Cheap kitchen scales cost less than a takeaway and remove the only genuinely unpredictable variable in the whole process. If you're working from a cup-measure recipe, spoon the flour into the cup and level it with a knife rather than dipping and packing.
- Roll every portion before you cook a single one. Once the pan is at temperature you have roughly forty seconds of undivided attention per round, and trying to roll the next one while watching the last is how you end up with one burnt and one raw. Line them up on a floured tray, cover with a damp cloth so the surfaces don't skin over, and then cook the whole batch straight through without stopping. The rhythm is half the technique.
- Brush water onto the top surface before the dough hits the pan, then lay it water side up. The moisture makes it grip the hot iron hard enough that you can invert the whole pan over the flame without the bread dropping into the burner. It sounds like a party trick, but it's the closest a home kitchen gets to a tandoor's radiant heat, and it's the difference between beige and properly leopard-spotted.
- Rest the dough at least twenty minutes, even in the no-yeast versions. This isn't about rising — it's about letting the gluten relax. Freshly kneaded dough is tight and springy, and it will fight the rolling pin and snap back every time you push it out, which forces you to roll harder and knock out the air you need. Twenty minutes under a cloth and it rolls out like it wants to.
- If cheese is going inside, drop the flame to medium and cover the pan for the first minute. Cheese needs considerably longer to melt than the base needs to brown, and a lid traps enough steam to buy you that time without turning the underside to charcoal. Grate the cheese rather than slicing it, and keep it well away from the edges so the seal holds when the interior starts to bubble and expand.
- Keep a small bowl of dry flour beside you, but use it sparingly. Every dusting you add is hydration you're quietly taking away, and the dough you feel most tempted to flour heavily is usually the one that would have made the best bread if you'd left it alone. Oil your hands instead of flouring the dough when it sticks — you get the same workability without drying the crumb.
- Cook the bread last, always. A curry that sits off the heat for ten minutes improves as the flavours settle; a flatbread that sits for ten minutes does not. Plan the whole meal backward from the moment the first round leaves the pan, and get everything else finished, plated and on the table before you light the tawa. Nobody minds waiting two minutes for bread. Everyone notices cold bread.
Frequently Asked Questions
Which of these naan recipes should I start with if I've never made bread?
Take the fourteen-minute homemade version or the instant no-yeast one. Both skip fermentation entirely, so there's nothing to get wrong on timing, and you can put all your attention on the two things that actually matter: a tacky dough and a properly preheated cast-iron pan. Once those feel natural in your hands, move up to the ninety-minute yeasted dough, which gives you a far better chew and more flavour but punishes impatience.
Can I make it without yeast?
Yes, and several recipes here do exactly that. Baking powder combined with yogurt or milk gives a fast lift and a soft, slightly tighter crumb. You lose the fermented tang and the big irregular holes, but you save forty minutes of waiting around, which on a Tuesday matters more than nuance. Once it's brushed with butter and torn open at the table alongside a good curry, most people genuinely cannot tell the difference.
Why isn't my bread puffing up on the pan?
Almost always one of three things: the dough is too dry, the pan isn't hot enough, or you rolled it too thin. Water flashing into steam is what inflates the bread, so a stiff, floury dough simply has no fuel to work with. Preheat cast iron for five full minutes, keep the dough tacky enough to stick slightly to your palm, stop rolling at about three millimetres, and resist pressing it with a spatula.
Can I use whole wheat flour instead of maida?
You can, and one recipe here is built specifically around it. Expect a nuttier, denser, sturdier bread with less dramatic puffing, because the sharp bran fragments cut through the gluten strands that would otherwise trap steam. Add roughly ten percent more water than the white-flour version calls for, and rest the dough a good deal longer so the bran hydrates fully instead of drinking moisture out of the crumb on the pan.
What's the difference between this and roti or pita?
Roti is unleavened whole wheat, rolled thin and cooked dry on a tawa — lean, quick and eaten every day across North India. Pita is leavened and baked in a hot oven so the whole thing inflates and splits into a pocket. This one sits apart from both: leavened, enriched with yogurt, milk or butter, and slapped against fierce direct heat, which is why it comes out softer, richer and blistered rather than hollow.
How do I make the dough ahead of time?
A yeasted dough will happily take a slow overnight rise in the fridge, and the flavour improves for it — cold fermentation builds depth you can't rush. Bring it back to room temperature for an hour before rolling, or it will fight you every inch. No-yeast doughs are far less suited to this, so mix those within a couple of hours of cooking, since baking powder starts spending its lift the moment it meets moisture.
Can I freeze it after cooking?
Absolutely, and it's much the best way to store leftovers. Cool completely first, stack with baking paper between each round so they don't weld together, and freeze for up to three months. Reheat straight from frozen on a dry hot pan for about a minute a side — the ice crystals turn to steam and re-inflate the crumb. Skip the microwave entirely; it drives moisture out and leaves the bread rubbery.
Do I need a special pan or a pizza stone?
No, but you do need thermal mass. A heavy cast-iron tawa or skillet holds its temperature when cold dough lands on it, which a thin nonstick pan cannot do — it crashes, and you get a pale, leathery round instead of a blistered one. If cast iron isn't an option, preheat a baking steel or heavy tray in the oven at maximum for twenty minutes, then finish under the overhead grill for ninety seconds.
What ties these naan recipes together isn't a technique so much as a mindset: wet dough, hot iron, hands off. Get those three right and the rest is decoration — garlic, cheese, a spiced potato filling, or a bowl of butter chicken beside it. Start with the fourteen-minute one tonight, and work up to the long rise when you have a spare afternoon.
From pillowy butter naan and pungent garlic naan to homemade naan bread you can char on a skillet, this is how to make naan without a tandoor and still get those blistered, bubbling rounds.
Related
- indian breads
- flatbread
- garlic naan
- butter chicken
- stovetop
- no-yeast
Popular Searches
- Best naan recipes
- Easy naan recipes
- Quick naan recipes
- Healthy naan recipes
- Simple naan recipes
- Homemade naan recipes
- Delicious naan recipes
- Popular naan recipes
- garlic naan
- butter naan
- how to make naan
- naan without tandoor
Marnirni-apinthi Building, Lot Fourteen,
North Terrace, Adelaide, South Australia, 5000
Australia
