Authentic Biryani Gravy Recipe | Shorba Recipe

User profile image
Rajani (@thegourmetschoice)

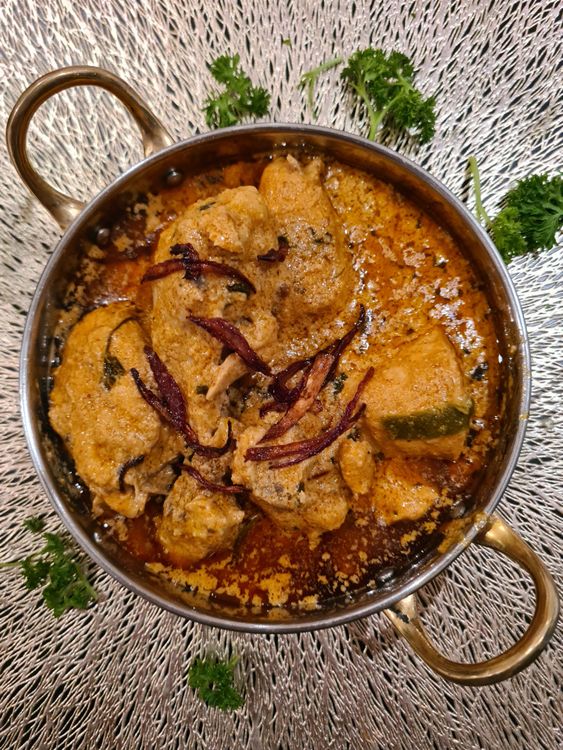
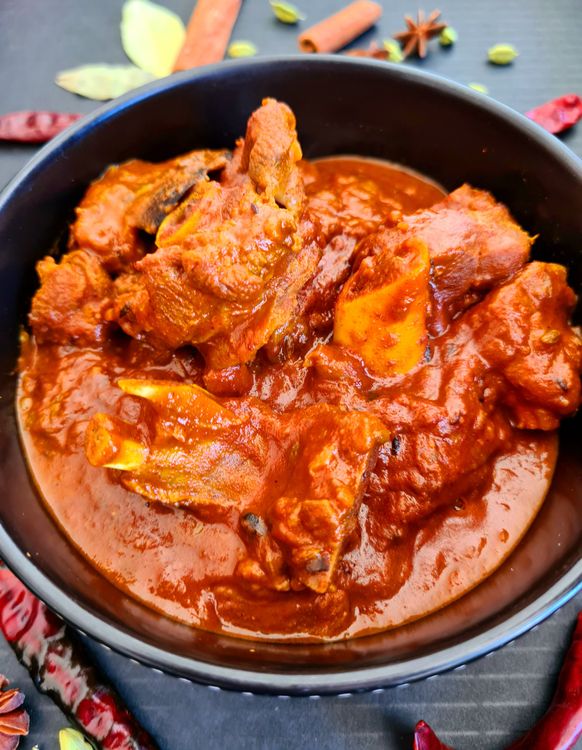
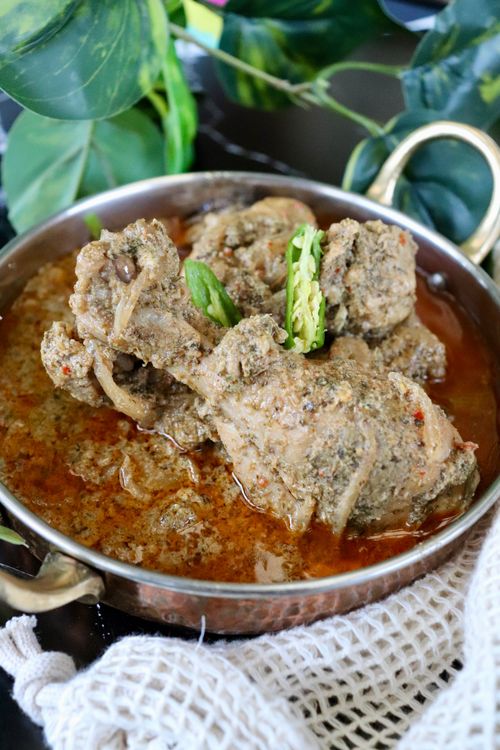
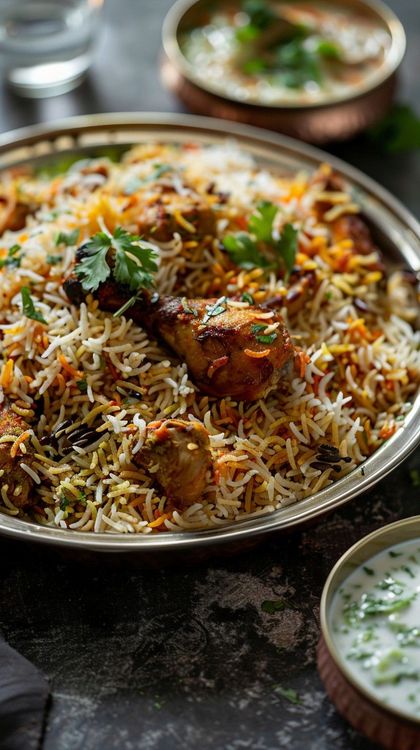
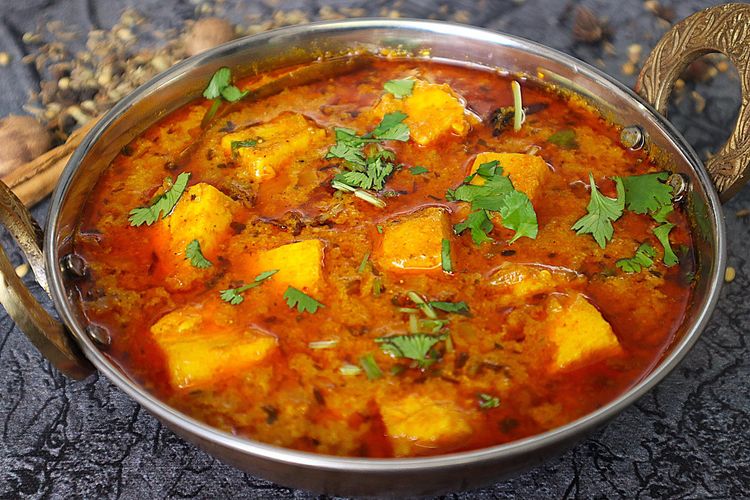
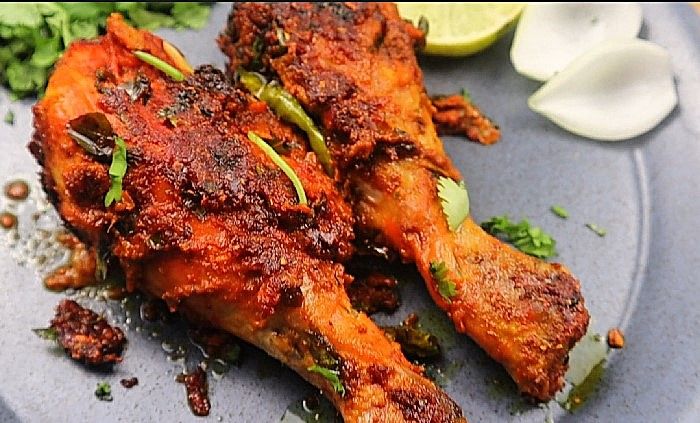
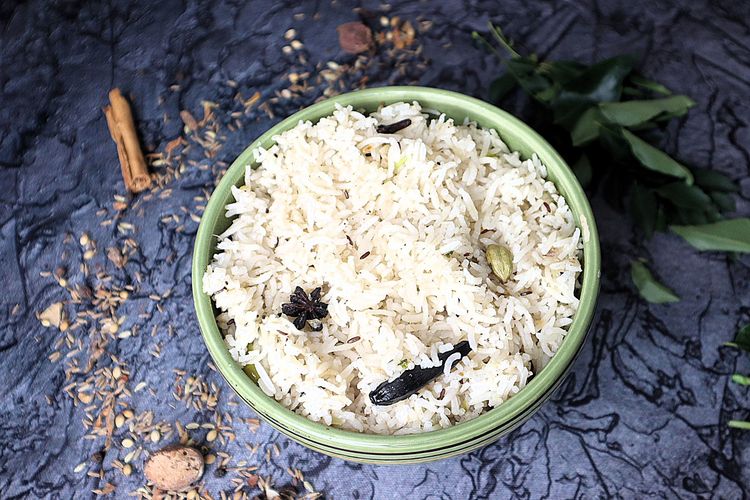
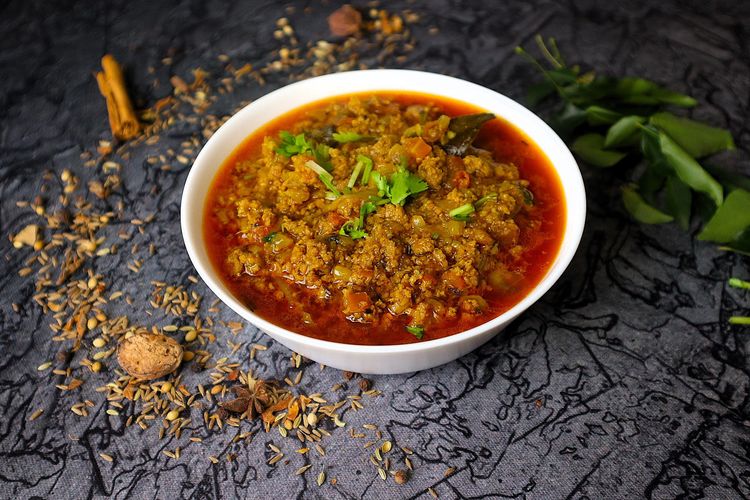
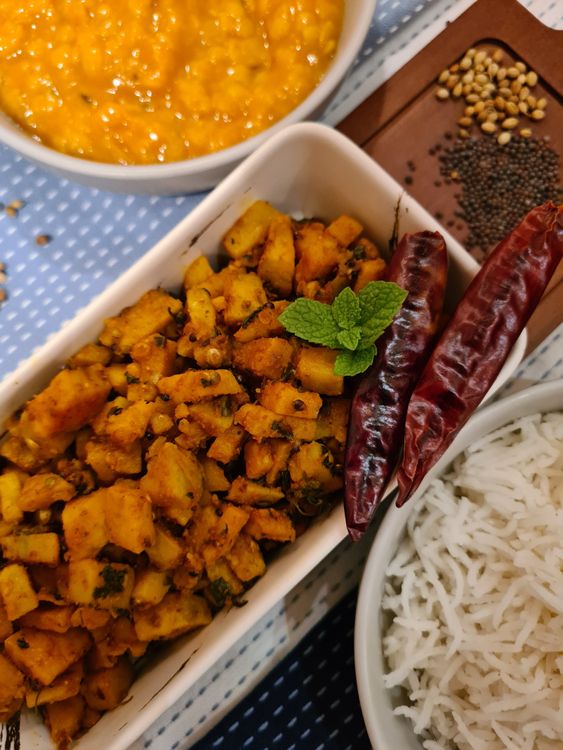
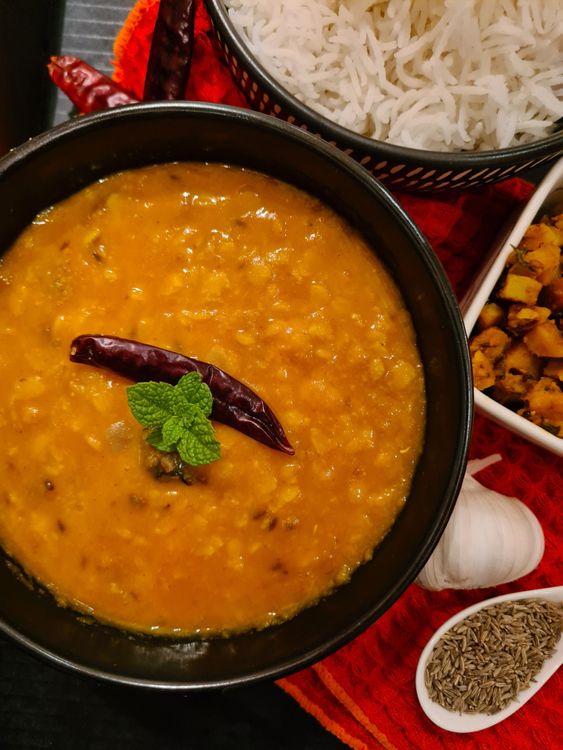
A flavorful gravy, also known as biryani shorba or sherva, perfect for pairing with biryani, pulao, or parotta.

Authentic Biryani Gravy Recipe | Shorba Recipe  recipe
Prep Time
10min
Cook Time
30min
Total Time
40min

Ingredients

4 Servings
(1 serving = 1 cup)

For Masala Paste

  • peanut
    peanut
    2tbsp
  • sesame
    sesame
    2tbsp
  • dry coconut
    dry coconut
    2tbsp
  • oil
    oil
    2tsp
  • onion, sliced
    onion, sliced
    1/2piece
  • ginger garlic paste
    ginger garlic paste
    1tsp
  • tomato, sliced
    tomato, sliced
    1piece
  • mint, chopped
    mint, chopped
    2tbsp
  • water
    water
    1/2cup

For Gravy

  • oil
    oil
    3tbsp
  • cumin
    cumin
    1tsp
  • cinnamon
    cinnamon
    1in
  • cardamom pods
    cardamom pods
    2piece
  • bay leaf
    bay leaf
    1piece
  • turmeric
    turmeric
    1/4tsp
  • Kashmiri chilli powder
    Kashmiri chilli powder
    3/4tsp
  • coriander powder
    coriander powder
    1/2tsp
  • cumin powder
    cumin powder
    1/4tsp
  • garam masala
    garam masala
    1/2tsp
  • salt
    salt
    3/4tsp
  • water
    water
    2cup
  • coriander, finely chopped
    coriander, finely chopped
    2tbsp

How to make Authentic Biryani Gravy Recipe | Shorba Recipe

Preparing Masala Paste

  1. Step 1

    Roast the peanuts until the skin separates. Brown dots appears on outside

    Step 1.1: Roast the peanuts until the skin separates
    Step 1.2: Roast the peanuts until the skin separates
    Step 1.3: Roast the peanuts until the skin separates
  2. Step 2

    Roast the sesame and dry coconut on low flame until golden. Do not Burn the coconut. Please keep the flame low when frying the ingredients.

    Step 1.1: Roast the sesame and dry coconut on low flame until golden
    Step 1.2: Roast the sesame and dry coconut on low flame until golden
    Step 1.3: Roast the sesame and dry coconut on low flame until golden
    Step 1.4: Roast the sesame and dry coconut on low flame until golden
  3. Step 3

    In a pan, heat oil and sauté the sliced onion and ginger garlic paste. Saute until the raw smell disappears from the ginger and garlic paste.

    Step 1.1: In a pan, heat oil and sauté the sliced onion and ginger garlic paste
    Step 1.2: In a pan, heat oil and sauté the sliced onion and ginger garlic paste
    Step 1.3: In a pan, heat oil and sauté the sliced onion and ginger garlic paste
    Step 1.4: In a pan, heat oil and sauté the sliced onion and ginger garlic paste
    Step 1.5: In a pan, heat oil and sauté the sliced onion and ginger garlic paste
    Step 1.6: In a pan, heat oil and sauté the sliced onion and ginger garlic paste
  4. Step 4

    Add the sliced tomato, Coriander leaves, and chopped mint. Sauté until the tomatoes turn soft and mushy.

    Step 1.1: Add the sliced tomato, Coriander leaves, and chopped mint
    Step 1.2: Add the sliced tomato, Coriander leaves, and chopped mint
    Step 1.3: Add the sliced tomato, Coriander leaves, and chopped mint
  5. Step 5

    Add Half tsp salt so that it helps in the process fast. cool completely and transfer to the blender.

    Step 1.1: Add Half tsp salt so that it helps in the process fast
    Step 1.2: Add Half tsp salt so that it helps in the process fast
    Step 1.3: Add Half tsp salt so that it helps in the process fast
  6. Step 6

    Add the roasted Coconut mixture to the same blender.

    Step 1.1: Add the roasted Coconut mixture to the same blender
  7. Step 7

    Add water and blend to a smooth paste. Keep aside.

    Step 1.1: Add water and blend to a smooth paste
    Step 1.2: Add water and blend to a smooth paste
    Step 1.3: Add water and blend to a smooth paste

Preparing Gravy

  1. Step 1

    In a large kadai, heat oil and sauté cumin, cinnamon, cardamom pods, and bay leaf.

    Step 2.1: In a large kadai, heat oil and sauté cumin, cinnamon, cardamom pods, and bay leaf
    Step 2.2: In a large kadai, heat oil and sauté cumin, cinnamon, cardamom pods, and bay leaf
    Step 2.3: In a large kadai, heat oil and sauté cumin, cinnamon, cardamom pods, and bay leaf
    Step 2.4: In a large kadai, heat oil and sauté cumin, cinnamon, cardamom pods, and bay leaf
    Step 2.5: In a large kadai, heat oil and sauté cumin, cinnamon, cardamom pods, and bay leaf
    Step 2.6: In a large kadai, heat oil and sauté cumin, cinnamon, cardamom pods, and bay leaf
  2. Step 2

    Add the prepared masala paste and sauté for 3-4 minutes.

    Step 2.1: Add the prepared masala paste and sauté for 3-4 minutes
    Step 2.2: Add the prepared masala paste and sauté for 3-4 minutes
    Step 2.3: Add the prepared masala paste and sauté for 3-4 minutes
  3. Step 3

    Add turmeric, Kashmiri chilli powder, coriander powder, cumin powder, garam masala, and salt.

    Step 2.1: Add turmeric, Kashmiri chilli powder, coriander powder, cumin powder, garam masala, and salt
    Step 2.2: Add turmeric, Kashmiri chilli powder, coriander powder, cumin powder, garam masala, and salt
    Step 2.3: Add turmeric, Kashmiri chilli powder, coriander powder, cumin powder, garam masala, and salt
    Step 2.4: Add turmeric, Kashmiri chilli powder, coriander powder, cumin powder, garam masala, and salt
    Step 2.5: Add turmeric, Kashmiri chilli powder, coriander powder, cumin powder, garam masala, and salt
    Step 2.6: Add turmeric, Kashmiri chilli powder, coriander powder, cumin powder, garam masala, and salt
  4. Step 4

    Sauté until the oil separates from the masala paste.

    Step 2.1: Sauté until the oil separates from the masala paste
    Step 2.2: Sauté until the oil separates from the masala paste
    Step 2.3: Sauté until the oil separates from the masala paste
  5. Step 5

    Add water and mix well. Rinse the Jar with enough water.

    Step 2.1: Add water and mix well
    Step 2.2: Add water and mix well
    Step 2.3: Add water and mix well
    Step 2.4: Add water and mix well
  6. Step 6

    Cover and boil for 10 minutes or until oil starts to float.

    Step 2.1: Cover and boil for 10 minutes or until oil starts to float
    Step 2.2: Cover and boil for 10 minutes or until oil starts to float
  7. Step 7

    Finally, add chopped coriander and serve. Authentic Biryani Gravy or** Sherva Recipe** Is Ready to serve with Biryani, Pulav, or Parotta.

    Step 2.1: Finally, add chopped coriander and serve
    Step 2.2: Finally, add chopped coriander and serve

Nutrition (per serving)

Calories

141.0kcal (7.05%)

Protein

3.6g (7.26%)

Carbs

10.4g (3.77%)

Sugars

1.9g (3.76%)

Healthy Fat

7.2g

Unhealthy Fat

2.1g

% Daily Value based on a 2000 calorie diet

Chefadora AI is Here.

Experience smarter, stress-free cooking.

Tips & Tricks

  1. This gravy can be made ahead of time and stored in the fridge. Reheat before serving.

  2. This gravy pairs well not only with biryani but also with parotta and pulao.

  3. You can include vegetables in the gravy as per your choice.

FAQS

  1. How do I make authentic biryani gravy from scratch?

    To make authentic biryani gravy, start by roasting peanuts, sesame seeds, and dry coconut until golden. Sauté sliced onions and ginger garlic paste in oil until fragrant, then add tomatoes, coriander leaves, and mint. Blend this mixture with the roasted coconut and water to form a smooth paste. In a separate pan, sauté spices like cumin, cinnamon, and cardamom, then add the masala paste and cook until the oil separates. Finally, add water, boil, and serve with biryani or pulao.

  2. What are some dietary substitutions for the biryani shorba recipe?

    If you're looking for dietary substitutions in the biryani shorba recipe, you can replace peanuts with sunflower seeds for a nut-free option. For a vegan version, ensure that the oil used is plant-based and consider using vegetable broth instead of water for added flavor. Additionally, you can use coconut milk instead of water for a creamier texture.

  3. How should I store leftover biryani gravy?

    To store leftover biryani gravy, let it cool completely before transferring it to an airtight container. It can be refrigerated for up to 3-4 days. If you want to keep it longer, consider freezing it in portions. When ready to use, thaw in the refrigerator overnight and reheat on the stove, adding a little water if needed to adjust the consistency.

  4. What dishes pair well with biryani shorba?

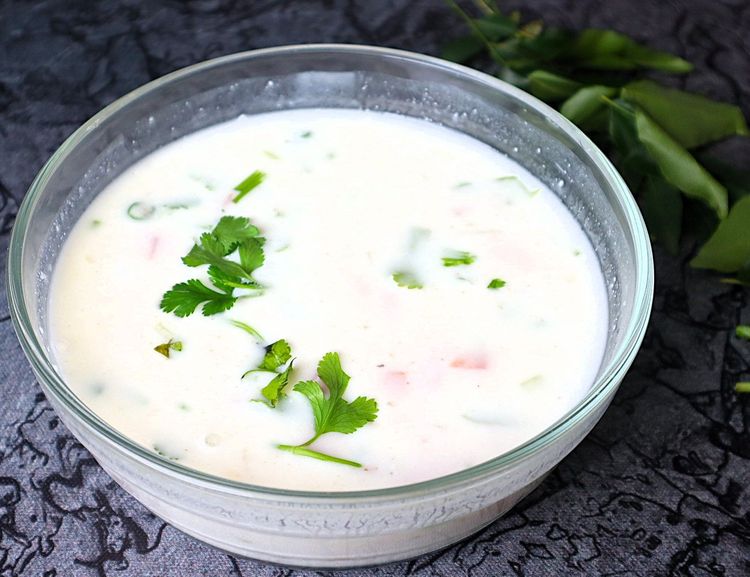
    Biryani shorba pairs wonderfully with biryani, pulao, or parotta. You can also serve it alongside naan or roti for a complete meal. For a refreshing touch, consider serving it with a side of raita or a salad to balance the spices.

  5. Can I make biryani gravy in advance for meal prep?

    Yes, you can make biryani gravy in advance for meal prep. Prepare the gravy as per the recipe, let it cool, and store it in an airtight container in the refrigerator. It can be made up to 3 days ahead of time. Just reheat it on the stove before serving, and it will taste just as delicious!

Loading reviews...

thegourmetschoice's profile picture

Rajani

(@thegourmetschoice)

Hi I like cooking and serving others. I have 15 Years of experience in cooking. When ever I get free time I will prepare delicious...

chefadora
© 2025 Chefadora Pty Ltd, All Rights Reserved

Marnirni-apinthi Building, Lot Fourteen,
North Terrace, Adelaide, South Australia, 5000
Australia